
|
|
What we did - Making kitesPart threeTurn the kite over. Make a loop in a length of string and tie the ends to points A and B so that the loop is mid way between the two sides. Allow the string to be slightly slack as this is where we connect the long string to launch the kite.Next comes the tail. Various methods were used for this such as strips of old cotton material joined end on end. Another way was something like the tail shown at the left of the kite. This can be simply small pieces of paper lightly screwed up and tied to a length of string. Tie the tail to the bottom of the kite at point C. Tie a nice long length of string to point D and head to the park to do a test run. You will have to experiment with the length of the tail - let out a good length of string and run into the wind - hopefully your kite will fly. If it gets off the ground but doesn't move upwards then your tail may be too long (too heavy) or too short where the kite spirals round and round. |
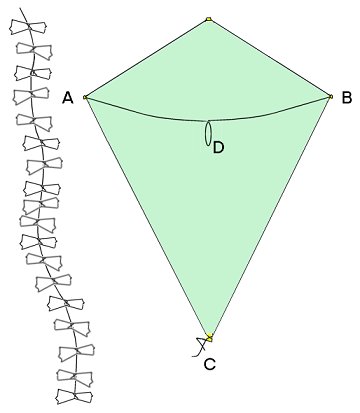 Probably the hardest job is getting the tail length sorted out which is really a matter of trial and error. Have fun. |